

Showing posts with label Simple. Show all posts
Showing posts with label Simple. Show all posts
Monday, May 26, 2014
Subtle Polka Dots
Hey everyone! Sorry again for my absence, (I feel like I say this so often now!) this last month of school has been really stressful and I haven't had time to paint my nails. I seriously can't wait for summer, it feels like I haven't had time to relax in years. Anyways, yesterday I finally had time to paint my nails again. Keep reading to find out more!

Tuesday, March 25, 2014
Fresh White Nails
Hey everyone! Tonight I'm posting something fairly simple, just fresh white nails, but I am joined by a fun ring to make this post more exciting! I've been feeling a bit uninspired lately so I went with a classic color. Not to worry though, I'm collabing with another nail artist on IG for a special post coming soon! :)

Wednesday, March 19, 2014
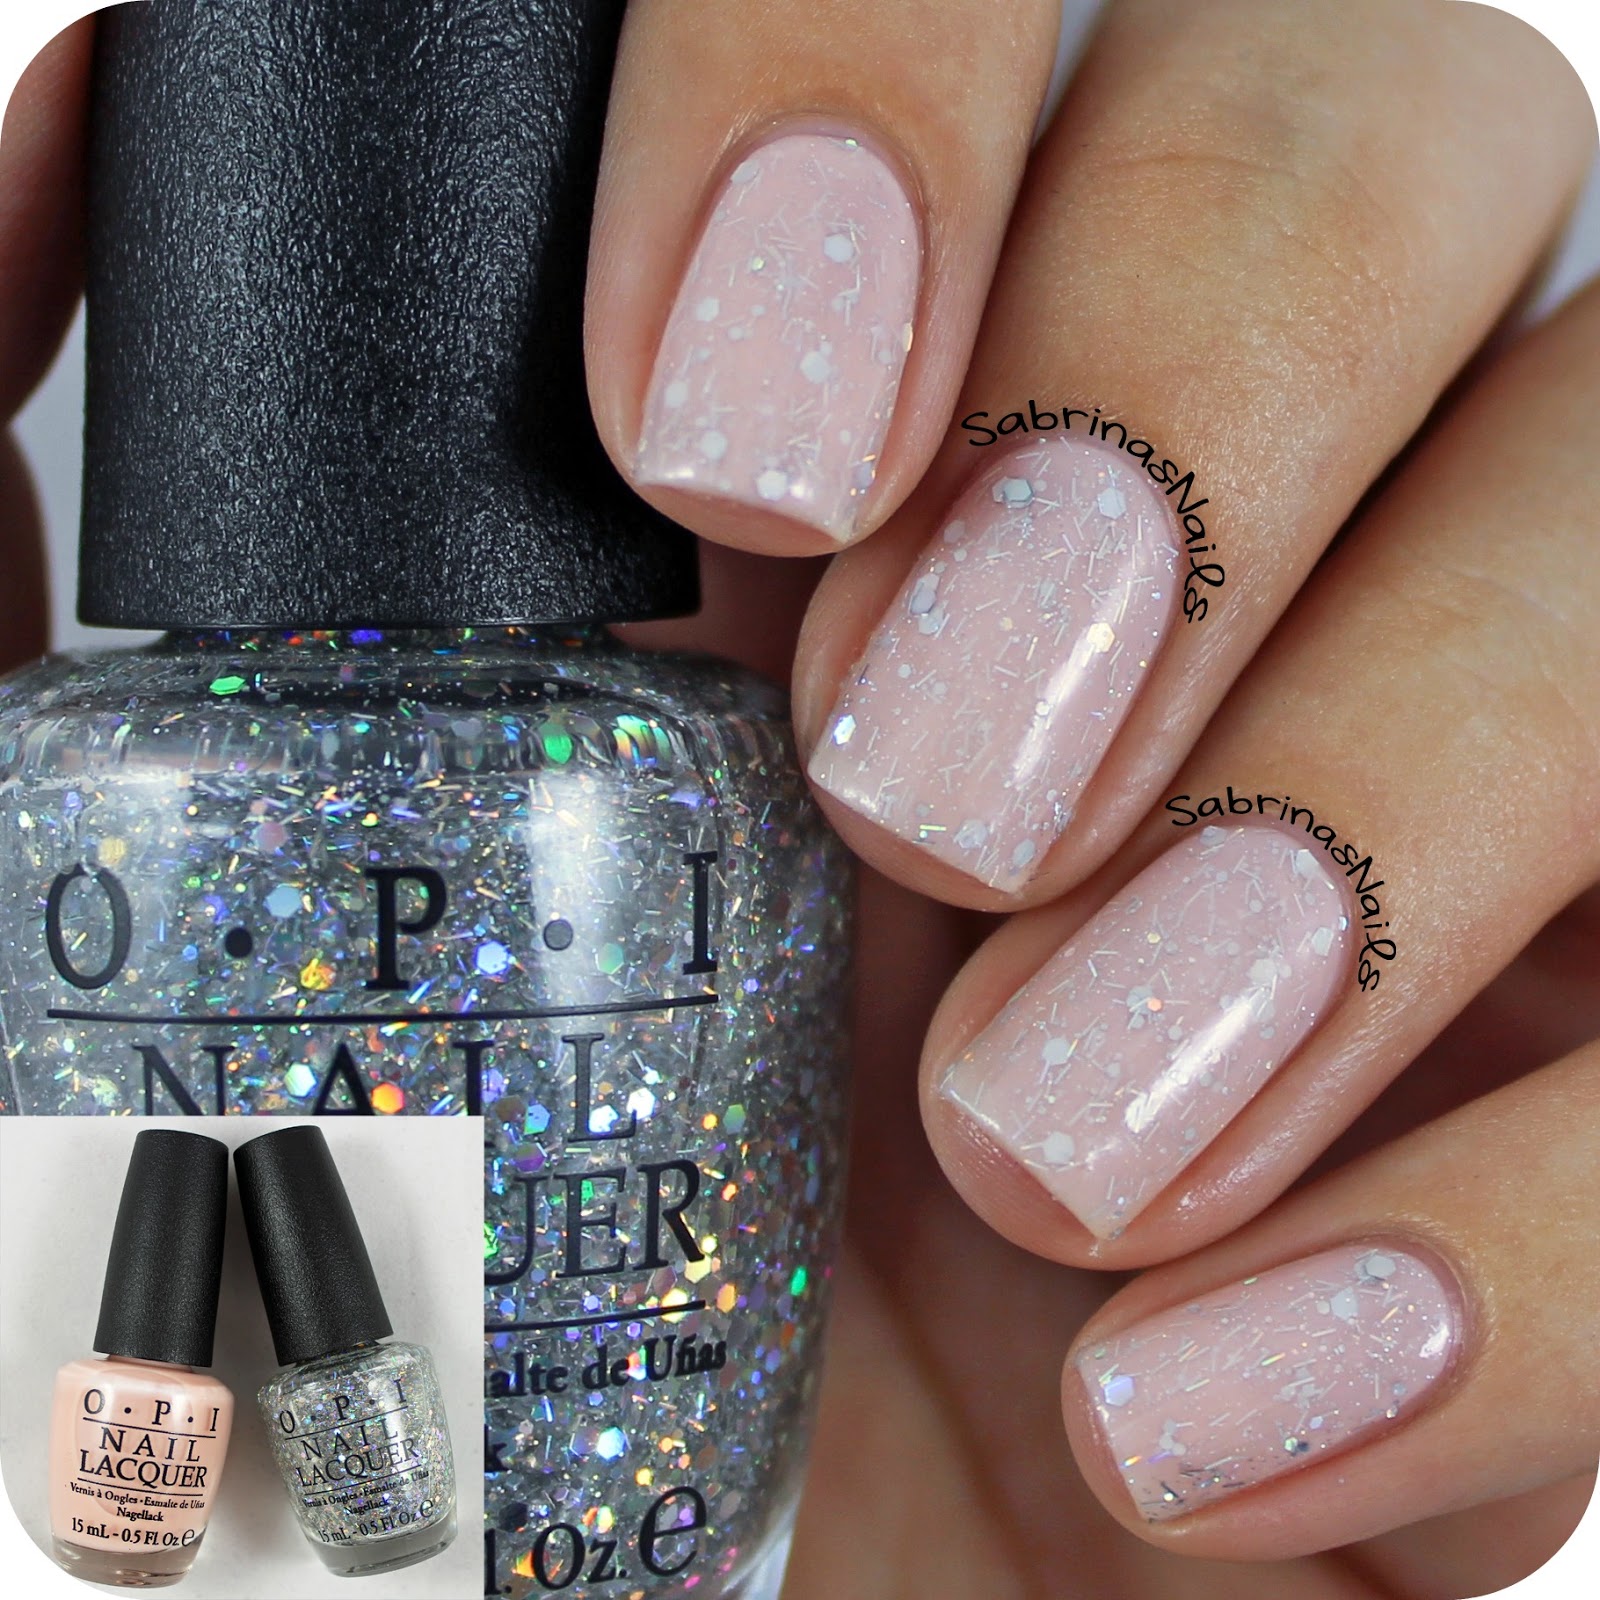
OPI Jelly Sandwich
Hey everyone! Today I have a long awaited jelly sandwich mani that I've been wanting to try for the longest time! I've done jelly sandwiches before, but now that I have OPI's Bubble Bath, I've had the urge to try this technique again. Continue reading for sparkly goodness! (WARNING: This will be a picture heavy post!)
Tuesday, March 4, 2014
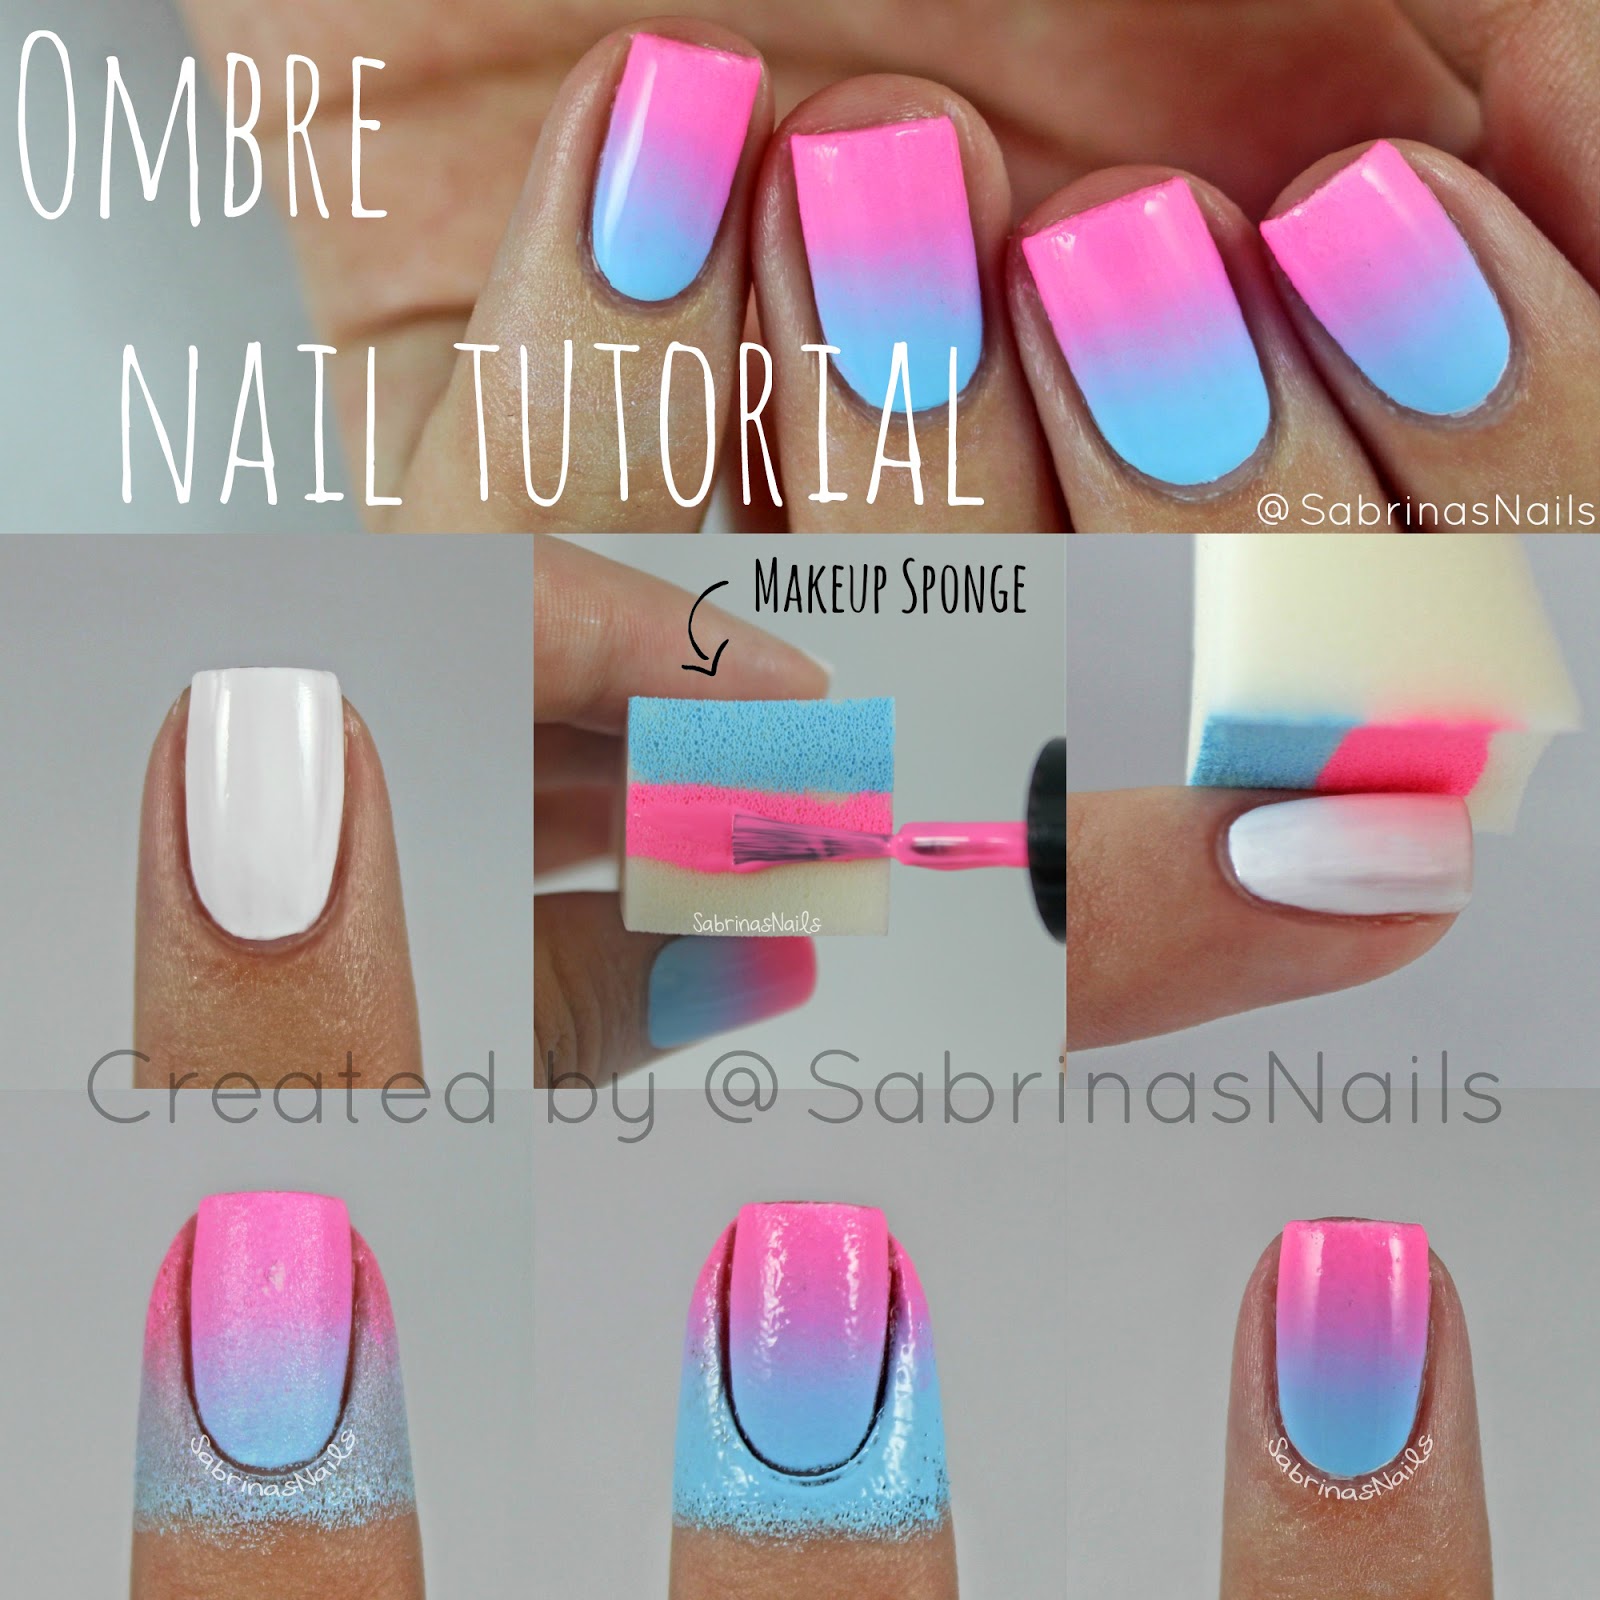
Ombre Nail Tutorial!
Happy Tuesday! Today I have an Ombre Nail Tutorial to share with you :) I'm honestly becoming obsessed with creating pictorials, they're so fun to make! Enjoy!
Sunday, February 16, 2014
Precision Nail Lacquer - Oasis Collection
Hey everyone, today I have some nail swatches for you. Precision Nail Lacquer was so kind and sent me their new Oasis Collection to share with you all! This collection includes nudes, browns, and even a shimmer shade! If you're interested, please keep reading :)

Monday, February 3, 2014
Ruffian Nail Tutorial!
Today is the day that I get to share my pictorial with you all! Sorry that it has so many watermarks, I've had previous pictorials stolen before and they've been plastered with other people's Instagram usernames on top of mine so I wanted to make sure it wouldn't happen again. I spent so much time on this and I really hope you love it! :)

Sunday, February 2, 2014
Coral & Rose Gold Ruffian Nails

Good afternoon everyone! Right now I'm enjoying a Girls marathon (is anyone else in love with that show?!) and stressing out about how much homework I have on this gloomy Sunday evening, which means that this is a perfect time to procrastinate and blog :) Today I have some super cute ruffian nails to share with you that I'm honestly in love with. If you read yesterday's blog post, you'd know that I was thinking of adding a ruffian design on top of my swatch of Zelda by Julep, I tried it last night and they came out great!
Saturday, February 1, 2014
Julep - Zelda
Good morning everyone! Today I'm sharing with you a swatch of a new polish I got for Christmas. For the past few days I've been wearing Zelda by Julep. I can't wait to share my thoughts on this polish with you all!

Tuesday, January 28, 2014
Stars and Half Moons
Onto my nails, the other day I was browsing through Candice's lovely Instagram (@MrCandiiPants) and was completely inspired by her twist on half moons + a french tip! So inspired that I revolved my whole mani around them, adding stars for an extra touch of chic.

Monday, January 6, 2014
#NailArtJan - Sparkles
Phew, today was easier to figure out than Day 3 - Fresh! I have so many glitter polishes but I immediately knew which one I wanted to use. I recently bought Essie's Lots of Lux, it's been staring at me for a while and I realized that this was a perfect time to use it!


Lots of Lux is a cobalt blue, textured polish. In the bottle you can really see the blue, green, and deep purple shimmer throughout the polish. When applied, it dries to a matte texture that's somewhat gritty but really beautiful because of all of the sparkle. Did I also mention that it's 99% opaque in one coat?! Seriously, so many people have had the same reactions and I didn't believe it until I tried it. Of course, I had to add another coat because I just don't feel okay without it, but it's fine with just one!
Out in the sunlight, you can easily see the texture in Lots of Lux. If you prefer smooth nails, you could add a topcoat to this but I really love the fine grit to this. Overall I'm so happy that I purchased this nail polish! I haven't heard that many good things about Essie's Encrusted Treasures Collection but Lots of Lux sure seems to be a hit! I also purchase Ignite the Night and I'm praying that it's as fabulous as this! Not too sure if I'll be purchasing Belugaria or Peak of Chic any time soon but so far I love what Essie has done with Lots of Lux. I'm so excited to wear this for the next few days, I'm afraid I won't be able to focus on school with nails like these :) So tell me, what do you think of the Encrusted Treasures Collection? Do you own any polishes from it or do you plan to? I'm personally on the fence about buying any more but Hors D'ouevres and On A Silver Platter just look so nice! Leave me a comment about what you think down below!
Sunday, January 5, 2014
#NailArtJan - Fresh
It was honestly really difficult to think of a nail design that is seen as "fresh." I first think of fresh air, freshly cut grass and fresh fruit, but I didn't really want any of those things on my nails. So I decided on fresh flowers. I had seen a design a few weeks ago by @OrlyNailGirls and completely fell in love. The design included a sheer background and crisp, white flowers on top of it.


To start, I grabbed the nail polishes that I needed. For the nudey-pink base, I used Essie's Mademoiselle. I also needed a white polish for the flower petals so I used Sinful Color's Snow Me White. Lastly, for the center of the flower I used Mellow Yellow by Sally Hansen Xtreme Wear.
After painting my nails with two coats of Essie's Mademoiselle, I used a large dotting tool dipped in white polish to create a big flower at the top of my nail. As the flowers go down my nail and decrease in size, so do my dotting tools. I used a large, medium and small sized dotting tool for the flowers and a toothpick for the smallest daisy.
Once the flowers were dry, I took Mellow Yellow and created small dots in the center of each flower. I then added a matte top coat and I'm done! I love this design and I think it looks very fresh and it's such a palette cleanser compared to all of the sparkly and intricate New Years nails. I hope you guys love these as much as I do and I hope you all had a fun and safe New Year!
Wednesday, December 25, 2013
Pink & Gold
Merry Christmas! :) I'm finally back to posting regularly on Instagram and on my blog because of Winter Break! These past few weeks of school have been stressful and I haven't really had time to do my nails (which is why I didn't do any holiday themed nails). But today after spending time with my family, I had time to paint my nails with two of my (29) new nail polishes that were gifted to me by my friends and family. (Anyone want to see all of my new pretties?)

Today I decided to go for something simple because of how beautiful these colors are on their own. My aunt bought me two new mini Color Clubs that I am really in love with. The first is Modern Pink. This polish was a little bit hard to work with because of how streaky it was, but after four coats I was able to even it out. The gold polish is called Take The Stage. This nail polish is a clear base with medium sized hex glitters and holographic flakes scattered through it as well. Since this polish has a clear base I think it works way better with undies (I used Sally Hansen's Golden-I).


Today I decided to go for something simple because of how beautiful these colors are on their own. My aunt bought me two new mini Color Clubs that I am really in love with. The first is Modern Pink. This polish was a little bit hard to work with because of how streaky it was, but after four coats I was able to even it out. The gold polish is called Take The Stage. This nail polish is a clear base with medium sized hex glitters and holographic flakes scattered through it as well. Since this polish has a clear base I think it works way better with undies (I used Sally Hansen's Golden-I).
Overall I'm really liking this combo, I think it's elegant but still fun because of the bright pink. I topped this mani off with one coat of Seche Vite. I hope y'all had a great time this holiday season and spent a lot of time with loved ones and even might've gotten some nice gifts! I'll see you next time!
Sunday, December 8, 2013
NOTD: Essie's Lilacism
For the past week I've been wearing the oh-so fabulous Lilacism by Essie! I recently bought this polish at Target on Black Friday thinking that it would be on sale, but everything seemed to be at regular price. Being me, I purchased it anyway because I convinced myself that all of my other light purple polishes looked nothing like this one.


Lilacism is from Essie's 2010 Art of Spring Collection but is now on Essie's Core Collection, meaning that you can find it at any time wherever Essie is sold. This polish is a dusty lilac color with blue undertones and is opaque in 2-3 coats. The first coat is streaky but once you add another, it's perfect. I used Seche Vite as my topcoat and this polish started chipping at day 6 which I personally think is great because I always like to switch my nail color up anyway.

In outdoor lighting, you can really see the blue undertones. And indoors it can change lilac to looking like a light grey. This cream polish is definitely unique and perfect for Winter & Spring! What are your thoughts on this polish? Tell me in the comments below or on Instagram! Farewell!

Wednesday, December 4, 2013
Silver Glitter Gradient + New Nail Shape!
Hello everyone! Today I have a really simple design and a brand new nail shape. I decided to switch to almond shape nails after ogling Christine's gorgeous nails for a few months now. Not sure how long I'll have this shape for but I'll enjoy it while it lasts!
On my nails I have a silver glitter gradient over a sheer pink. This look is extremely elegant and perfect for a wedding, holiday parties or any time you want some glam nails!


On my nails I have a silver glitter gradient over a sheer pink. This look is extremely elegant and perfect for a wedding, holiday parties or any time you want some glam nails!
I started this look with three thin coats of Mademoiselle by Essie. Mademoiselle is a new polish of mine and I really love it. It's sheer enough so you can slightly see your nail, but it's opaque enough to cover any stains I have on my nail. After the sheer polish was dry, I took Tiara by Orly and a makeup wedge and sponged the fine silver glitter onto 3/4 of my nail.
To add even more glitter, I sponged on Set In Stones by Essie to the tips of my nails. Finally, I added one coat of Seche Vite to seal all of that glitter in! I am honestly in love with these nails and I want to keep them on forever! I hope you like them too :)
Saturday, November 23, 2013
Black & White Polka Dots With a Twist!
Hey! Today I was in sort of a rush so I wanted a nail design that was simple but still really cute. I decided on pink nails with black and white polka dot accent nails! This design was really easy to do and I hope you like it!
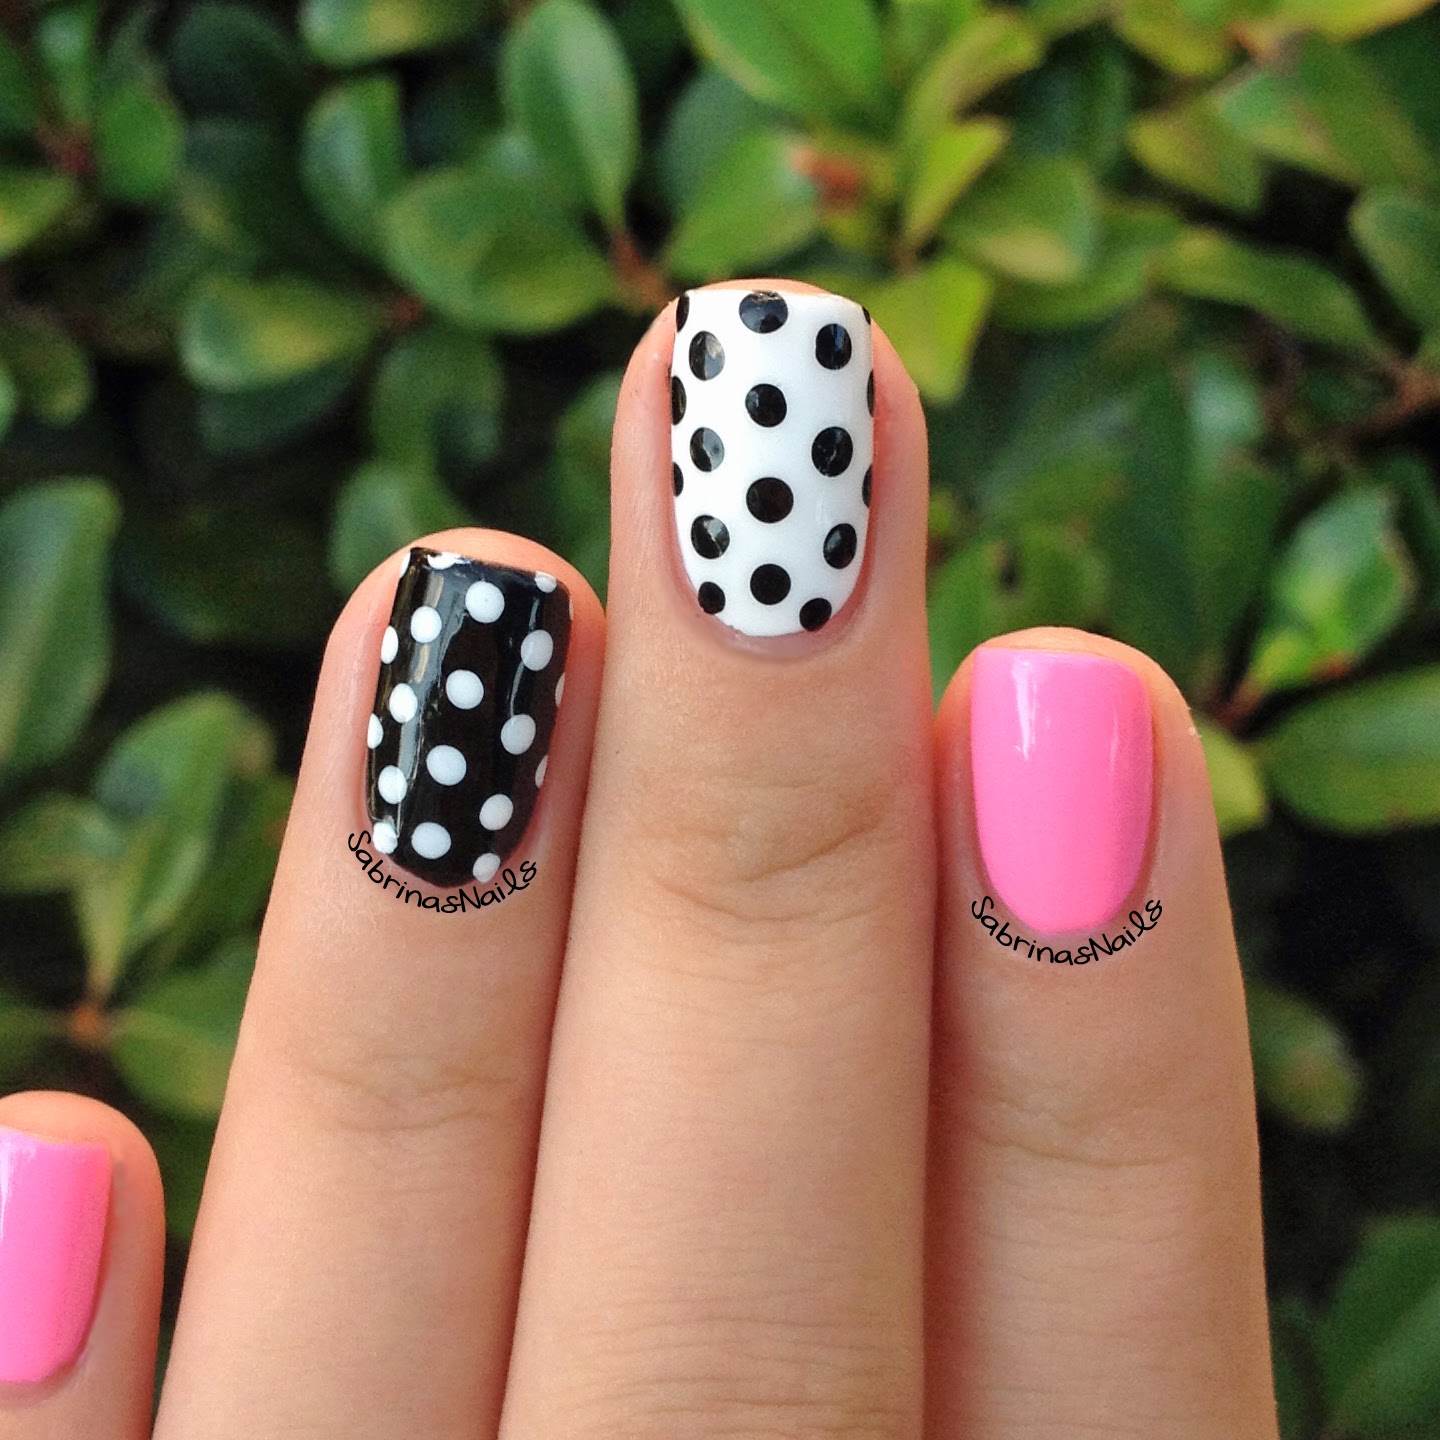
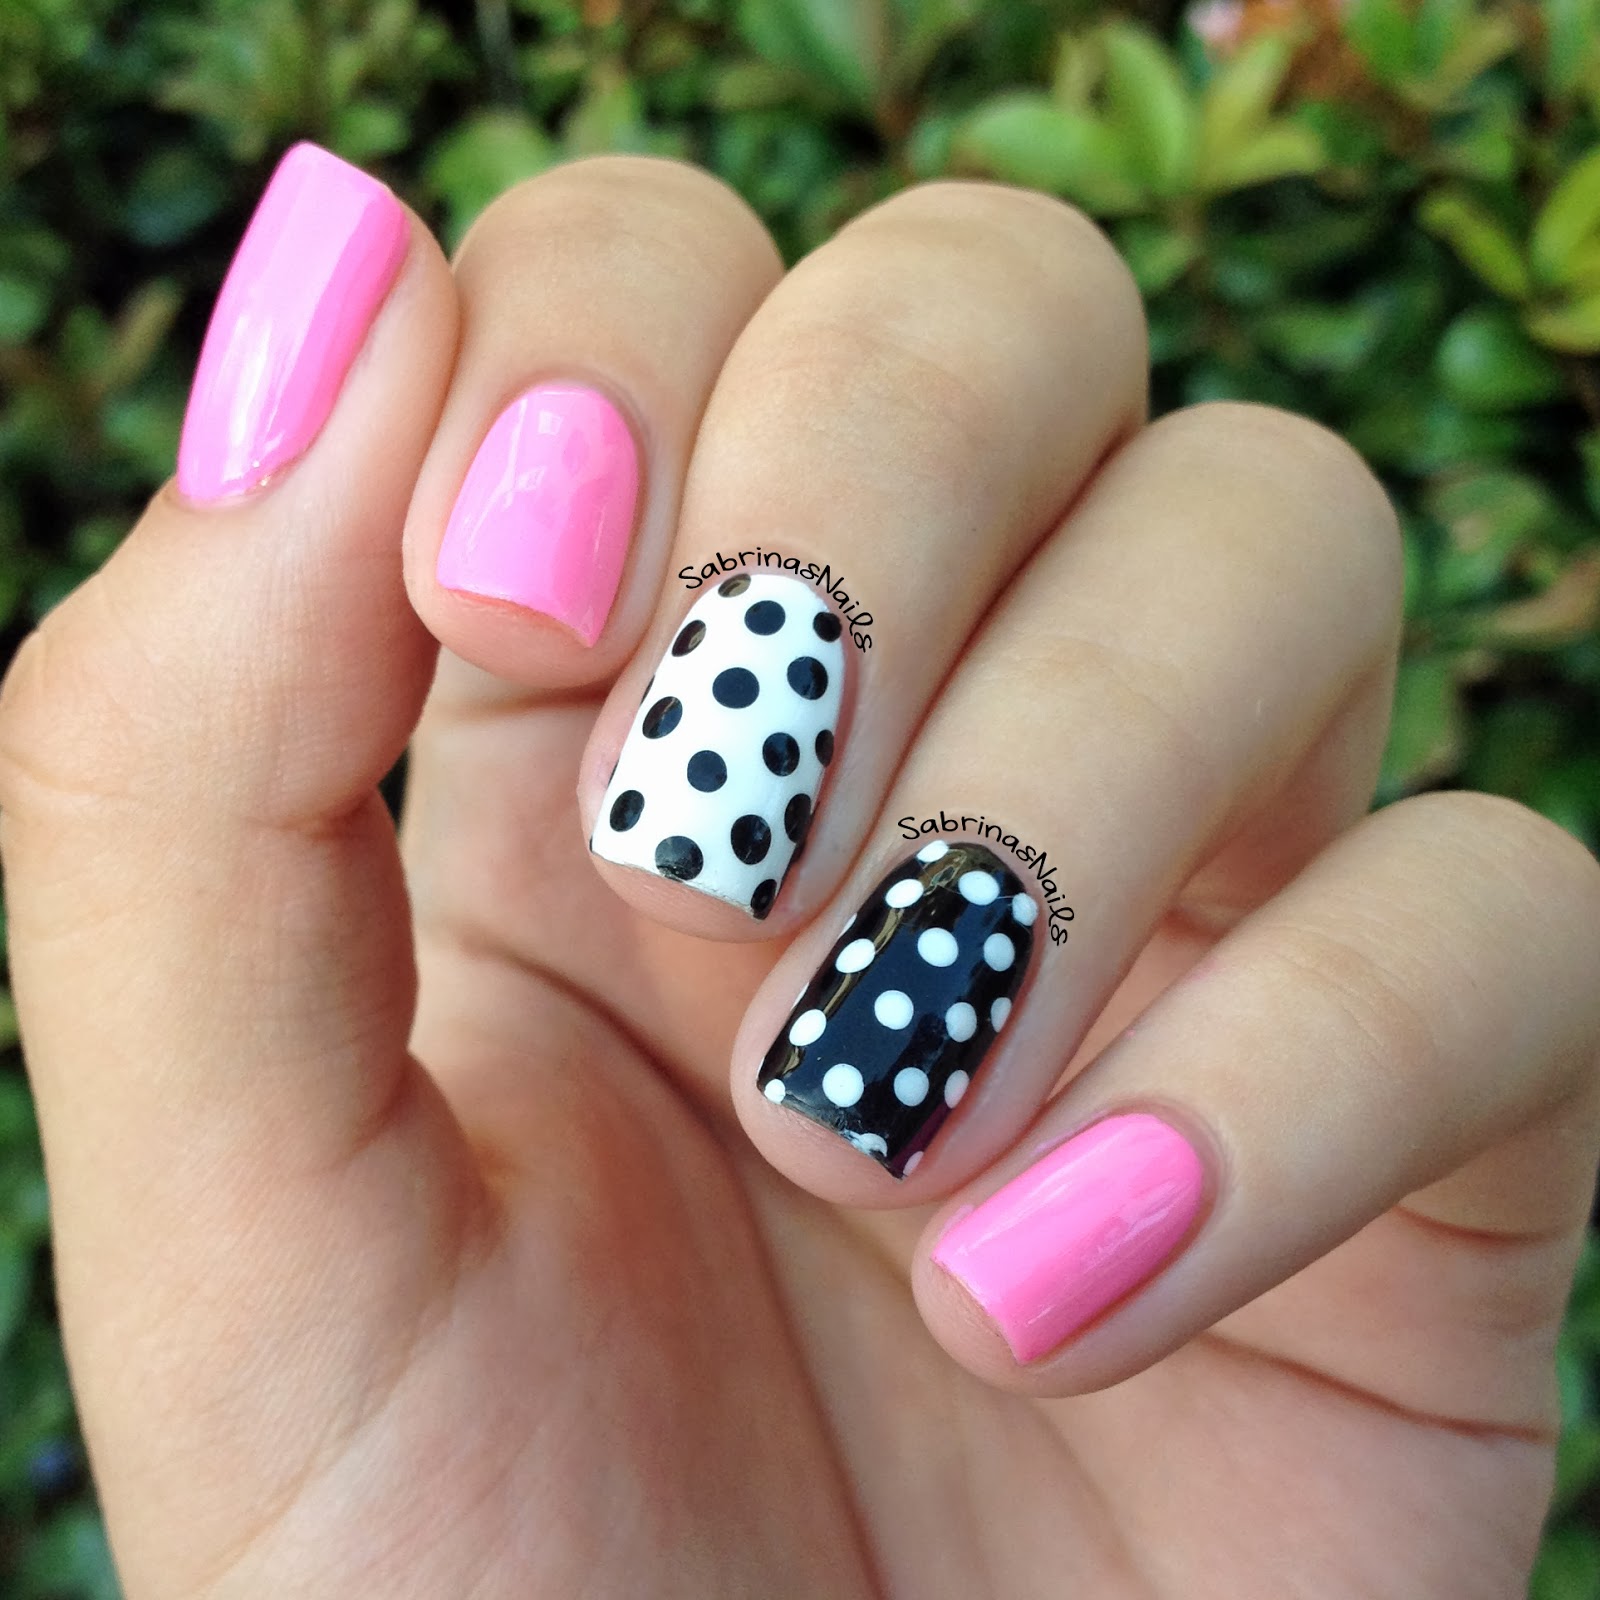


I began by painting my thumb, pinkie, and index finger with Essie's Boom Boom Room. I've talked about BBR so much since I've gotten it because it's my go-to pink polish. As always, the formula on this nail polish is perfection, opaque in two coats and it just glides on! This cream polish is amazing and I kind of feel bad for my other pink polishes because I use this one so much!
Next, I painted my middle finger with Superstar! by Pure Ice. It's not my favorite white polish but all of my other ones are streaky or thick. I then painted my ring finger with Liquid Leather by China Glaze. I feel like I've had this polish for years and it's still just as great as when I first bought it! It's opaque in two coats and it's also wonderful to use for nail art.
Finally, I used black to add polka dots to my middle finger and white to add polka dots to my ring finger. One coat of Seche Vite and it's done! These nails make me very happy despite the fact that my index finger nail is a bit broken :( I hope you like these and have a great day!
Wednesday, November 13, 2013
Nude to Blue Gradient
I was inspired by the gorgeous bright blue color (St Thomas Blue Me Away) that CurtsyandBow sent me, that I decided it was finally time for me to try a nude to color gradient. I have seen the trend everywhere and I think it's so pretty!


I began by applying two coats of a nude base (Trade Winds by Revlon) on my nails. Once that was dry, I took Trade Winds and St Thomas Blue Me Away and painted two horizontal stripes next to each other on a cosmetic wedge and sponged the colors onto my nail. This technique creates a flawless gradient every time! To help the colors blend and to add some sparkle, I added a coat of Fairy Dust by China Glaze, followed by one coat of Seche Vite.
I think these turned out really nicely and I'm excited to try this again with different colors! If you'd like to purchase St Thomas Blue Me Away, please visit www.CurtsyandBow.com! If you try this design out, use the hashtag #InspiredBySabrinasNails or send the picture to me by Email or Kik! Have a marvelous day :)
Sunday, November 10, 2013
Reviewing Curtsy and Bow Polishes
Recently I was contacted by Curtsy and Bow to review a few of their gorgeous nail polishes! I'd been a fan of their polishes for a while and was extremely thankful for this opportunity! After a short two day of making the arrangement, a package came in the mail with three full size bottles of their polishes, along with a lovely note!
I'm so excited to try these out, they are all so pretty and that is my favorite shade of blue! If you'd like to purchase any of these or see more of their products, go to www.CurtsyandBow.com!

 |
| From Left to Right: Jetset In My Sunset, St Thomas Blue Me Away & Shiraz With Tha Stahz |
Saturday, November 2, 2013
Gradient Triangles
My sister and I decided to have a "Nail Painting Day" to paint our nails with a similar design. We decided on a design that we've been seeing everywhere on Instagram and Pinterest. There's no specific name for them but they look like triangles that start near the cuticle.


I started this design with two coats of white polish topped with Seche Vite for faster dry time. Since I used tape for this mani, I had to wait about an hour until the white polish was completely dry or else once the tape is added, it will pull polish up with it. Once the polish was dry, I added two strips of tape starting from the cuticle and meeting up with each other to create a triangle. I then applied a dark purple polish ( Spontaneous by China Glaze), a medium purple polish (Play Date by Essie), and a light purple polish (Sweet Hook by China Glaze) onto a cosmetic wedge and started to sponge it onto the nail. After a few coats of sponging and a coat of Fairy Dust by China Glaze, I carefully peeled the tape off to reveal crisp lines on the triangle. I added one coat of Seche Vite and Voila! They're finished!

As I mentioned earlier, my sister also did her nails but she decided to do a pink gradient instead of purple. She followed the exact same steps as I did but her dark pink polish was Mod Square by Essie, her medium pink polish was Boom Boom Room by Essie, and her light pink polish was Muchi Muchi by Essie. We both loved how these turned out and kept these on for as long as we possibly could (a little over a week)! If you try these out, use the hashtag #InspiredBySabrinasNails or send the picture to me though Email or Kik! I'll see you next time!
Wednesday, October 30, 2013
NOTD: Sephora by OPI's I'm So Sari!
This week I've been wearing a gorgeous glitter polish from Sephora by OPI, named 'I'm So Sari!' This polish is from their 2012 Indian Summer Collection and my mom picked it up for me the other day at Sephora.


This is definitely a must have nail polish! This flashy polish has a teal crelly base, with dense teal glitter, and filled with silver holographic hexes. In three coats it's a complete glitter bomb and I couldn't stop staring at my nails this week! Do you own this polish? Tell me in the comments below or tell me on Instagram! Have a fabulous week :)
Saturday, October 12, 2013
Soothing Dreamcatchers
Not only do dreamcatchers help filter out bad dreams, but they also look really cute on your nails! I've seen dreamcatcher nails everywhere lately and decided to finally hop on the bandwagon! They were much simpler than I thought they would be and they turned out nicely along with a white to lavender ombre on the other nails.


The lavender color I used is Sweet Hook by China Glaze, it's a creamy light purple that is opaque in two coats. I also sponged on white for the ombre with Superstar! by Pure Ice and topped it off with Fairy Dust by China Glaze. To create the dreamcatcher I first used a black striper to create a half circle at the top of my nail and then filled it in with cross hatching. I also added three lines at different lengths to act as the string to hold all of the accessories on the dreamcatcher. Finally, I drew on pink and yellow beads and added brown feathers to complete the look! You can really customize these nails however you want, you change the background color, the amount of feathers and beads, and you can also change the design that goes inside of the half circle! If you try these out, use the hashtag #inspiredbysabrinasnails and tag me in the Instagram photo, or send me the picture through Kik or email! Have a great day!

Subscribe to:
Posts (Atom)