

Showing posts with label Blue. Show all posts
Showing posts with label Blue. Show all posts
Monday, May 26, 2014
Subtle Polka Dots
Hey everyone! Sorry again for my absence, (I feel like I say this so often now!) this last month of school has been really stressful and I haven't had time to paint my nails. I seriously can't wait for summer, it feels like I haven't had time to relax in years. Anyways, yesterday I finally had time to paint my nails again. Keep reading to find out more!

Saturday, May 3, 2014
Girly Nautical Nails!
What's up beautiful people? Today I have some super cool nails inspired by the wonderful Karissa from @LifeIsBetterPolished on Instagram! I recently saw her do some really pretty nautical themed nails and I knew I had to recreate them. I haven't done anything like this before and I really love it!

Sunday, April 27, 2014
Skimp or Spend? # 4
Long time no see! I'm so sorry that I've been gone for a week, I recently went on a mini vacation and that completely threw me off of my schedule! But I'm back with a new Skimp or Spend post :) Thank you guys for loving this series, I still get such amazing feedback from you all and I couldn't be happier. Continue reading if you'd like to find out the verdict of today's post!

Sunday, April 6, 2014
Pastel Galaxy Nails
It's the second to last day of my Spring Break and I feel like I want to cry! I've gotten so used to relaxing all day, I don't want to go back to having responsibilities. Haha but the good news is that I have new nails for you! Today I have some pastel galaxy nails that I love! I've tried traditional galaxy nails twice before but I wanted to add a twist to these. These pastel colors make this design perfect for Spring!

Thursday, March 27, 2014
Spring Polish Picks!
Happy Spring! Since the first day of Spring was a few days ago, I thought it was time to share my Spring Polish Picks with you all! Spring is one of my favorite times of the year because of the nice weather and pastel polishes ♥ Keep reading to find out what my favorite nail polishes are for this season!

Monday, March 10, 2014
Watermarble Nail Tutorial
Good afternoon dolls ♥ Today I have a long overdue pictorial to share with you! I'm so sorry for not being able to post this last Thursday like I planned to, I've been incredibly busy with school and tests :( I hope this tutorial can make up for it! Keep reading for written instructions on how to watermarble.

Sunday, March 9, 2014
Cotton Candy Watermarble Nails

Hey everyone! This will be a short and sweet post but I just wanted to share my finished design with you all :) I haven't done any watermarbling in such a long time and I've really been wanting to try it again so I thought this would be the perfect time to get back into it!
Tuesday, March 4, 2014
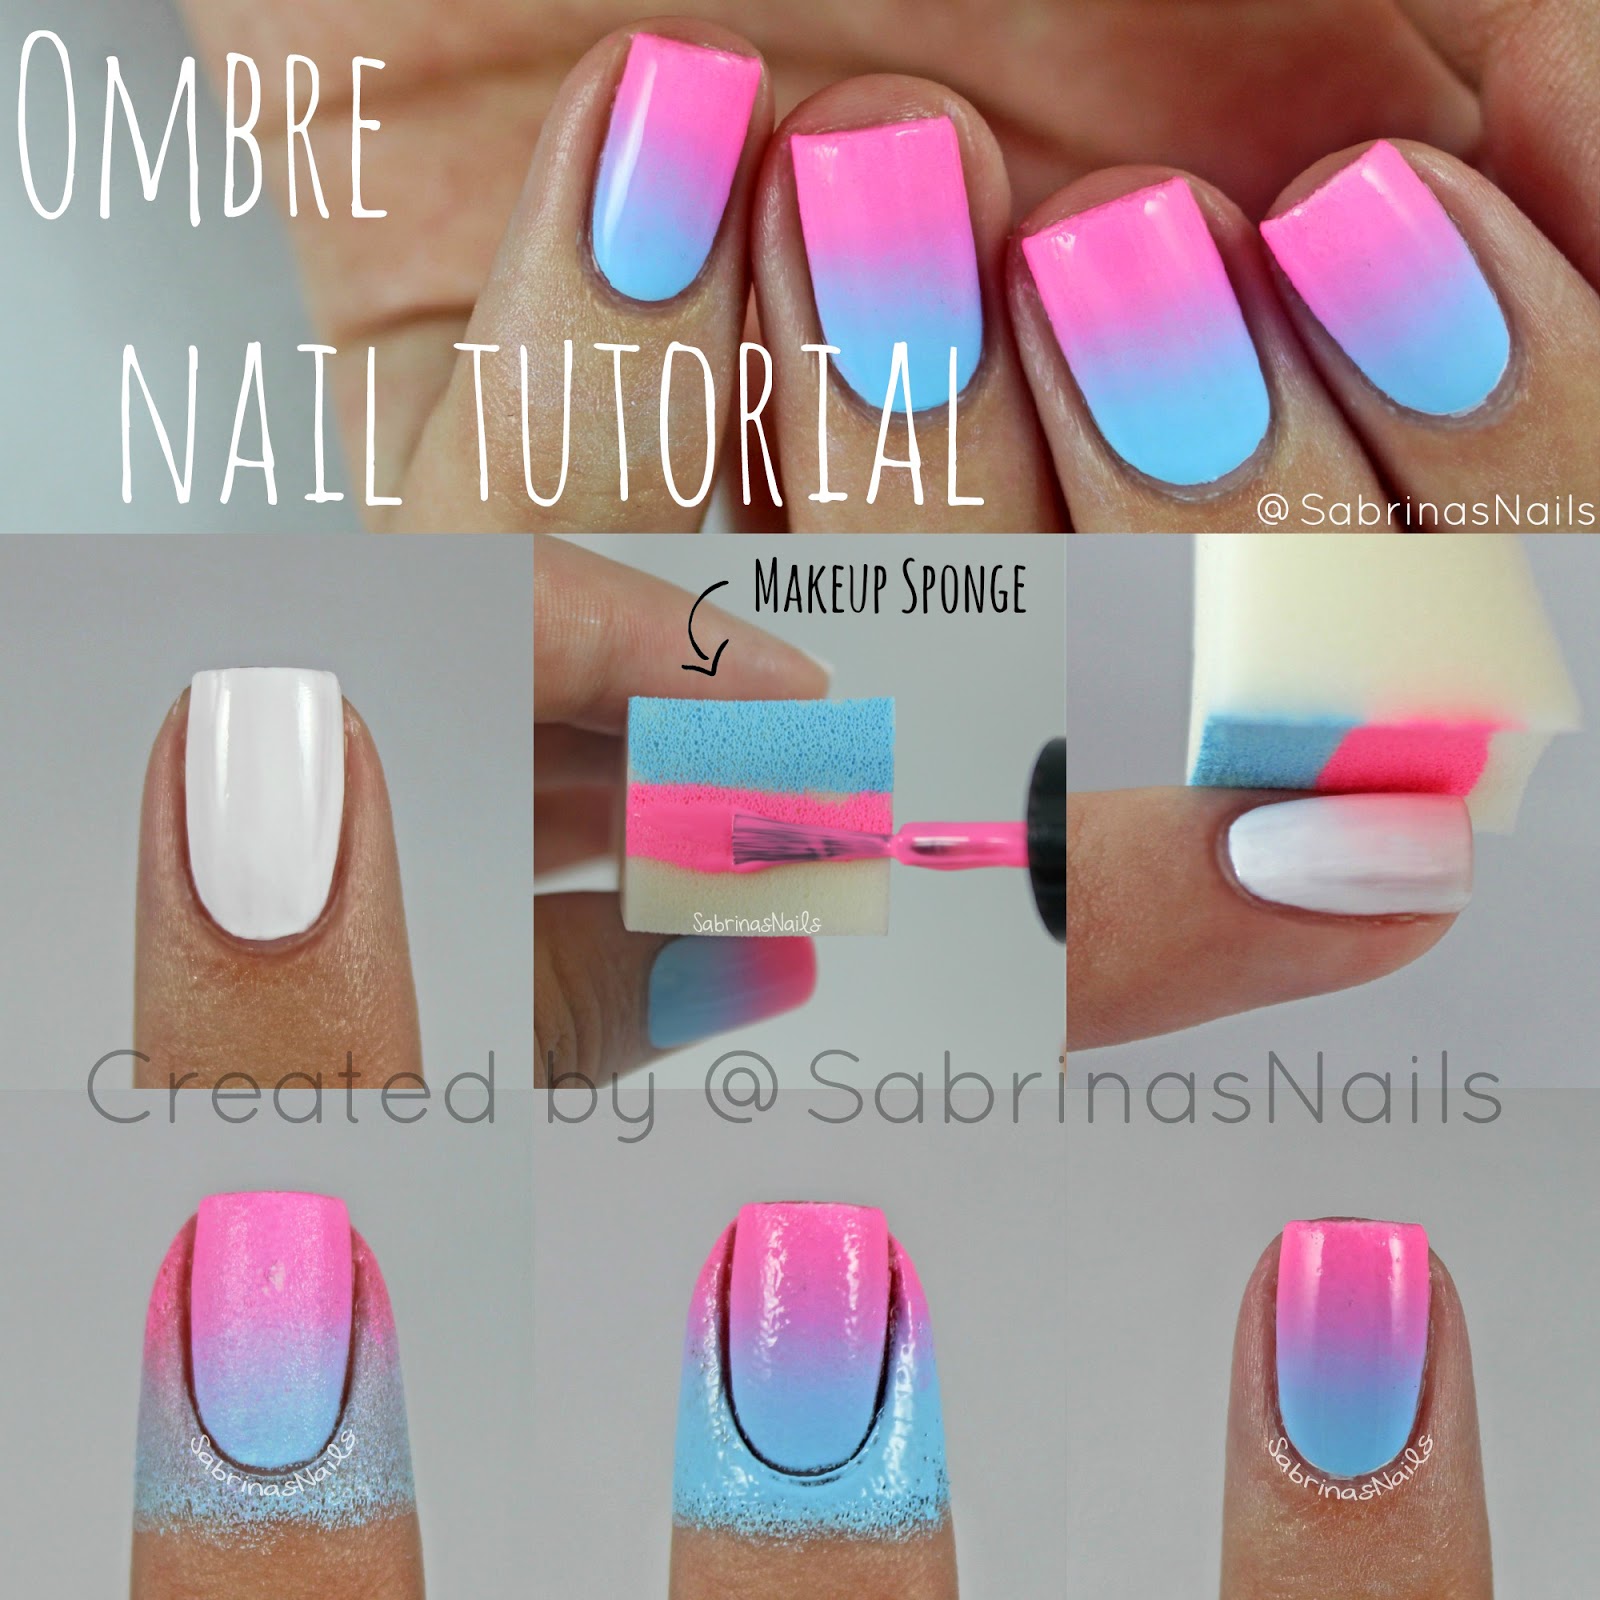
Ombre Nail Tutorial!
Happy Tuesday! Today I have an Ombre Nail Tutorial to share with you :) I'm honestly becoming obsessed with creating pictorials, they're so fun to make! Enjoy!
Monday, March 3, 2014
Cotton Candy Ombre Nails

Hi everyone! Today I have sort of a 'part one' to some nail art I'm working on :) These bright ombre nails are my base for something I'll be posting on Wednesday! These were really fun to do and I hope you like them!
Wednesday, January 29, 2014
Polishes I Received this Christmas!
Hey guys! I know Christmas was over a month ago but I never had the chance to show you all what polishes I received this past holiday. I'm so grateful for the friends and family that fed my polish addiction and I'm so excited to share my new pretties with you!
*Disclaimer* I am in no way trying to brag about things that were given to me. I simply want to share them with you and show you my collection as it grows. I love reading about what polishes people bought/ received so I thought this would be a good idea :) I also want to mention that this will be a picture heavy post!
To start, I'll show you polishes from one of my favorite brands, Essie! These polishes were given to me by my aunt, my friend Madi, and my mom!
 |
| From L to R: Off the Shoulder, Shake Your $$ Maker, Sable Collar & Using My Maiden Name |
Monday, January 6, 2014
#NailArtJan - Sparkles
Phew, today was easier to figure out than Day 3 - Fresh! I have so many glitter polishes but I immediately knew which one I wanted to use. I recently bought Essie's Lots of Lux, it's been staring at me for a while and I realized that this was a perfect time to use it!


Lots of Lux is a cobalt blue, textured polish. In the bottle you can really see the blue, green, and deep purple shimmer throughout the polish. When applied, it dries to a matte texture that's somewhat gritty but really beautiful because of all of the sparkle. Did I also mention that it's 99% opaque in one coat?! Seriously, so many people have had the same reactions and I didn't believe it until I tried it. Of course, I had to add another coat because I just don't feel okay without it, but it's fine with just one!
Out in the sunlight, you can easily see the texture in Lots of Lux. If you prefer smooth nails, you could add a topcoat to this but I really love the fine grit to this. Overall I'm so happy that I purchased this nail polish! I haven't heard that many good things about Essie's Encrusted Treasures Collection but Lots of Lux sure seems to be a hit! I also purchase Ignite the Night and I'm praying that it's as fabulous as this! Not too sure if I'll be purchasing Belugaria or Peak of Chic any time soon but so far I love what Essie has done with Lots of Lux. I'm so excited to wear this for the next few days, I'm afraid I won't be able to focus on school with nails like these :) So tell me, what do you think of the Encrusted Treasures Collection? Do you own any polishes from it or do you plan to? I'm personally on the fence about buying any more but Hors D'ouevres and On A Silver Platter just look so nice! Leave me a comment about what you think down below!
Wednesday, November 13, 2013
Nude to Blue Gradient
I was inspired by the gorgeous bright blue color (St Thomas Blue Me Away) that CurtsyandBow sent me, that I decided it was finally time for me to try a nude to color gradient. I have seen the trend everywhere and I think it's so pretty!


I began by applying two coats of a nude base (Trade Winds by Revlon) on my nails. Once that was dry, I took Trade Winds and St Thomas Blue Me Away and painted two horizontal stripes next to each other on a cosmetic wedge and sponged the colors onto my nail. This technique creates a flawless gradient every time! To help the colors blend and to add some sparkle, I added a coat of Fairy Dust by China Glaze, followed by one coat of Seche Vite.
I think these turned out really nicely and I'm excited to try this again with different colors! If you'd like to purchase St Thomas Blue Me Away, please visit www.CurtsyandBow.com! If you try this design out, use the hashtag #InspiredBySabrinasNails or send the picture to me by Email or Kik! Have a marvelous day :)
Sunday, November 10, 2013
Reviewing Curtsy and Bow Polishes
Recently I was contacted by Curtsy and Bow to review a few of their gorgeous nail polishes! I'd been a fan of their polishes for a while and was extremely thankful for this opportunity! After a short two day of making the arrangement, a package came in the mail with three full size bottles of their polishes, along with a lovely note!
I'm so excited to try these out, they are all so pretty and that is my favorite shade of blue! If you'd like to purchase any of these or see more of their products, go to www.CurtsyandBow.com!

 |
| From Left to Right: Jetset In My Sunset, St Thomas Blue Me Away & Shiraz With Tha Stahz |
Wednesday, October 30, 2013
NOTD: Sephora by OPI's I'm So Sari!
This week I've been wearing a gorgeous glitter polish from Sephora by OPI, named 'I'm So Sari!' This polish is from their 2012 Indian Summer Collection and my mom picked it up for me the other day at Sephora.


This is definitely a must have nail polish! This flashy polish has a teal crelly base, with dense teal glitter, and filled with silver holographic hexes. In three coats it's a complete glitter bomb and I couldn't stop staring at my nails this week! Do you own this polish? Tell me in the comments below or tell me on Instagram! Have a fabulous week :)

Sunday, October 20, 2013
Floral + Stripes
Today's blog post is dedicated to a cute floral and striped mani! I found inspiration from a photo I saw on Pinterest and I decided to recreate the roses and ended up with a fun and detailed design!


I started off this mani with Royally Yours by L'oreal on all of my nails except for the ring finger, a light and dusty blue color that was opaque in three coats. On my thumb and pinkie finger I added vertical stripes with a white striper. On the pointer and middle finger I carefully painted white (acrylic paint) and pink (Boom Boom Room by Essie) roses with a thin nail art brush and topped it off with curly green (acrylic paint) stems! Lastly, on my ring finger I started off with a base of gold polish (Golden-I by Sally Hansen) and added two coats of a chunky gold glitter polish (The Golden Age by Sephora by OPI [RIP]). To complete the look, I added one coat of my trusty Seche Vite topcoat! If you like this mani, feel free to tell me in the comments of this post or on Instagram! If you want to try it out for yourself, use the hashtag #InspiredBySabrinasNails or Kik me the photo of your results! See you next time!
Monday, September 23, 2013
Sephora By OPI Haul
Recently Sephora by OPI Nail Polish have been announced to be discontinued. As sad as that is, the good news is that they are all on sale for only $4.50! (Instead of their usual price of $9.00.) My mom took advantage of this sale and went to our local Sephora to pick up a few polishes for me. I told her that all I needed was a gold glitter polish but she came back with all of these beauties!

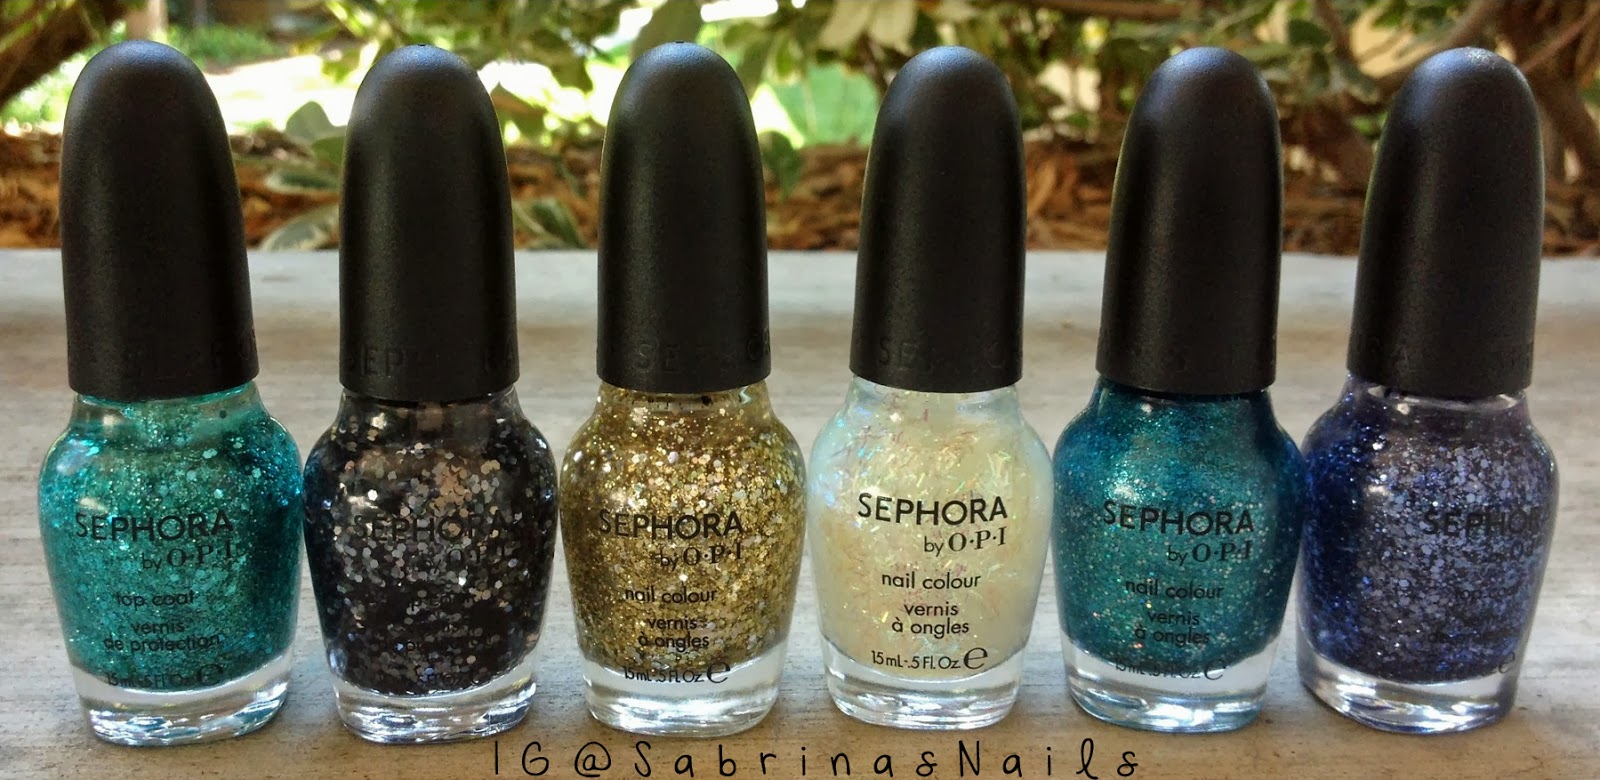 |
| (From L to R) Not Your Average Turquoise, To The Glitter End!, The Golden Age, Hollywood If I Could, I'm So Sari! and Indi-go With The Flow |
I'm in love with all of these and I can't wait to use them! I definitely recommend to check out the sale before all of the good colors run out! Have a nice day!
Thursday, August 15, 2013
Dazzling Chevrons
I finally decided to try out the famous chevron mani by @SelenaDee_Nails on Instagram! This design is not only popular, but very simple and appealing. I thought this design would be perfect for the Jonas Brothers concert I was going to that day, yes I was totally there for their comeback, and they were just as great since the last time I saw them in 2008!


I swapped out the bright red that Selena used on her thumb, index and pinkie fingers for Essie's Butler Please, a rich blue. This was the first time I used my new polish and I was honestly a bit confused. To my surprise, Butler Please is a crelly polish! It applied like a cream but was somewhat sheer and dried matte. It was opaque in two coats but with one more coat it was much brighter.
When I know I'm doing a full silver glitter nail, I always apply one coat of a metallic silver polish first. I do this so that there won't be empty spots if the glitter doesn't cover my whole nail, meaning I'll need less coats of the glitter polish. My go-to glitter is Essie's Set in Stones, it's packed with sparkle and will never disappoint! I layered three coats of that over one coat of Silver Mercedes by Pure Ice, a metallic polish.
For the accent chevron nail I started off with a few coats of Superstar! by Pure Ice, a creamy white. This isn't my favorite white polish, its a bit old and thick. I thought I had grabbed I Will! by Loreal but realized I hadn't and was too lazy to walk a few steps to my room to switch them out, haha so I thought this would do. When doing this tape mani, you have to make sure the white is completely dry before moving on, or else the tape could ruin the wet nail. I added a coat of Seche Vite to speed up the drying time.
In the mean time I was cutting up the pieces of tape for this design. I don't own any zigzag scissors so I followed @Jewsie_Nails tutorial for her easy chevrons. Using a regular piece of tape I folded it (sticky sides out) and cut an angled line down the fold, and then did it once again to get a thin v-shaped piece of tape after I opened it up.
I placed the pieces of tape on my dry nail and pressed them down to make sure no pieces were oddly lifted up. Then I painted two coats of Liquid Leather by China Glaze on my whole nail and quickly but carefully lifted the tape off of my nail. Ta-da! You're left with a beautiful chevron accent nail! I used my black and white nail art stripers to clean up any empty/uneven lines and I had a very clean and pretty chevron.
One coat of Seche Vite on each nail and the design was done! I'm pleased with how this came out and I'm definitely doing more chevron manis in the future now that I know how to do them. I hope you all like this and try this out! Have a great day!

Thursday, August 1, 2013
Freak Show Polish: Strongman II
To be honest, I was hesitant when trying this polish on. I didn't know how much different it would be to Strongman I. I'm happy to say that I was pleasantly surprised!


I started off with 4 coats of I Will! by L'oreal. It's one of the best white polishes I've tried so far! It's not thick or troublesome, it's thin but opaque. I could've gone with three coats but I'm a bit crazy and had to add an extra layer.
When the white polish dried, I topped it off with two coats of Strongman II by Freak Show Polish. I was absolutely blown away with how this looked! It was very similar to Strongman I but unique in it's own special way.
As you can see, it is gorgeous and looks different in different lighting. I love the large circle glitters and the smaller hexes, it is absolutely perfect and my favorite from all of the polishes that Carissa sent me.
Up close, you can tell that this polish is a glitter bomb. You will be getting tons of compliments if you wear this! Here's my rating of this polish:
Application: This polish isn't lumpy or thick, went on with ease.
True to Color: Yes, the glitter is just as vibrant as in the bottle.
Dry Time: 1-2 minutes.
Consistency: Normal.
Coats Until Opaque: With two coats, the glitter was mostly everywhere on the nail. I did place a few on myself just because I really love my nails to sparkle.
Additional Comments: This is up there with one of my favorite polishes I own! I will be wearing this all the time, I love how the bright glitter contrasts against the white base. You will not regret purchasing this!
Final Rating: 10/10
To purchase, visit FreakShowPolish.com or visit Carissa's Instagram (Instagram.com/FreakShowPolish) to view more swatches and polishes!
Freak Show Polish: Trapeze Swinger
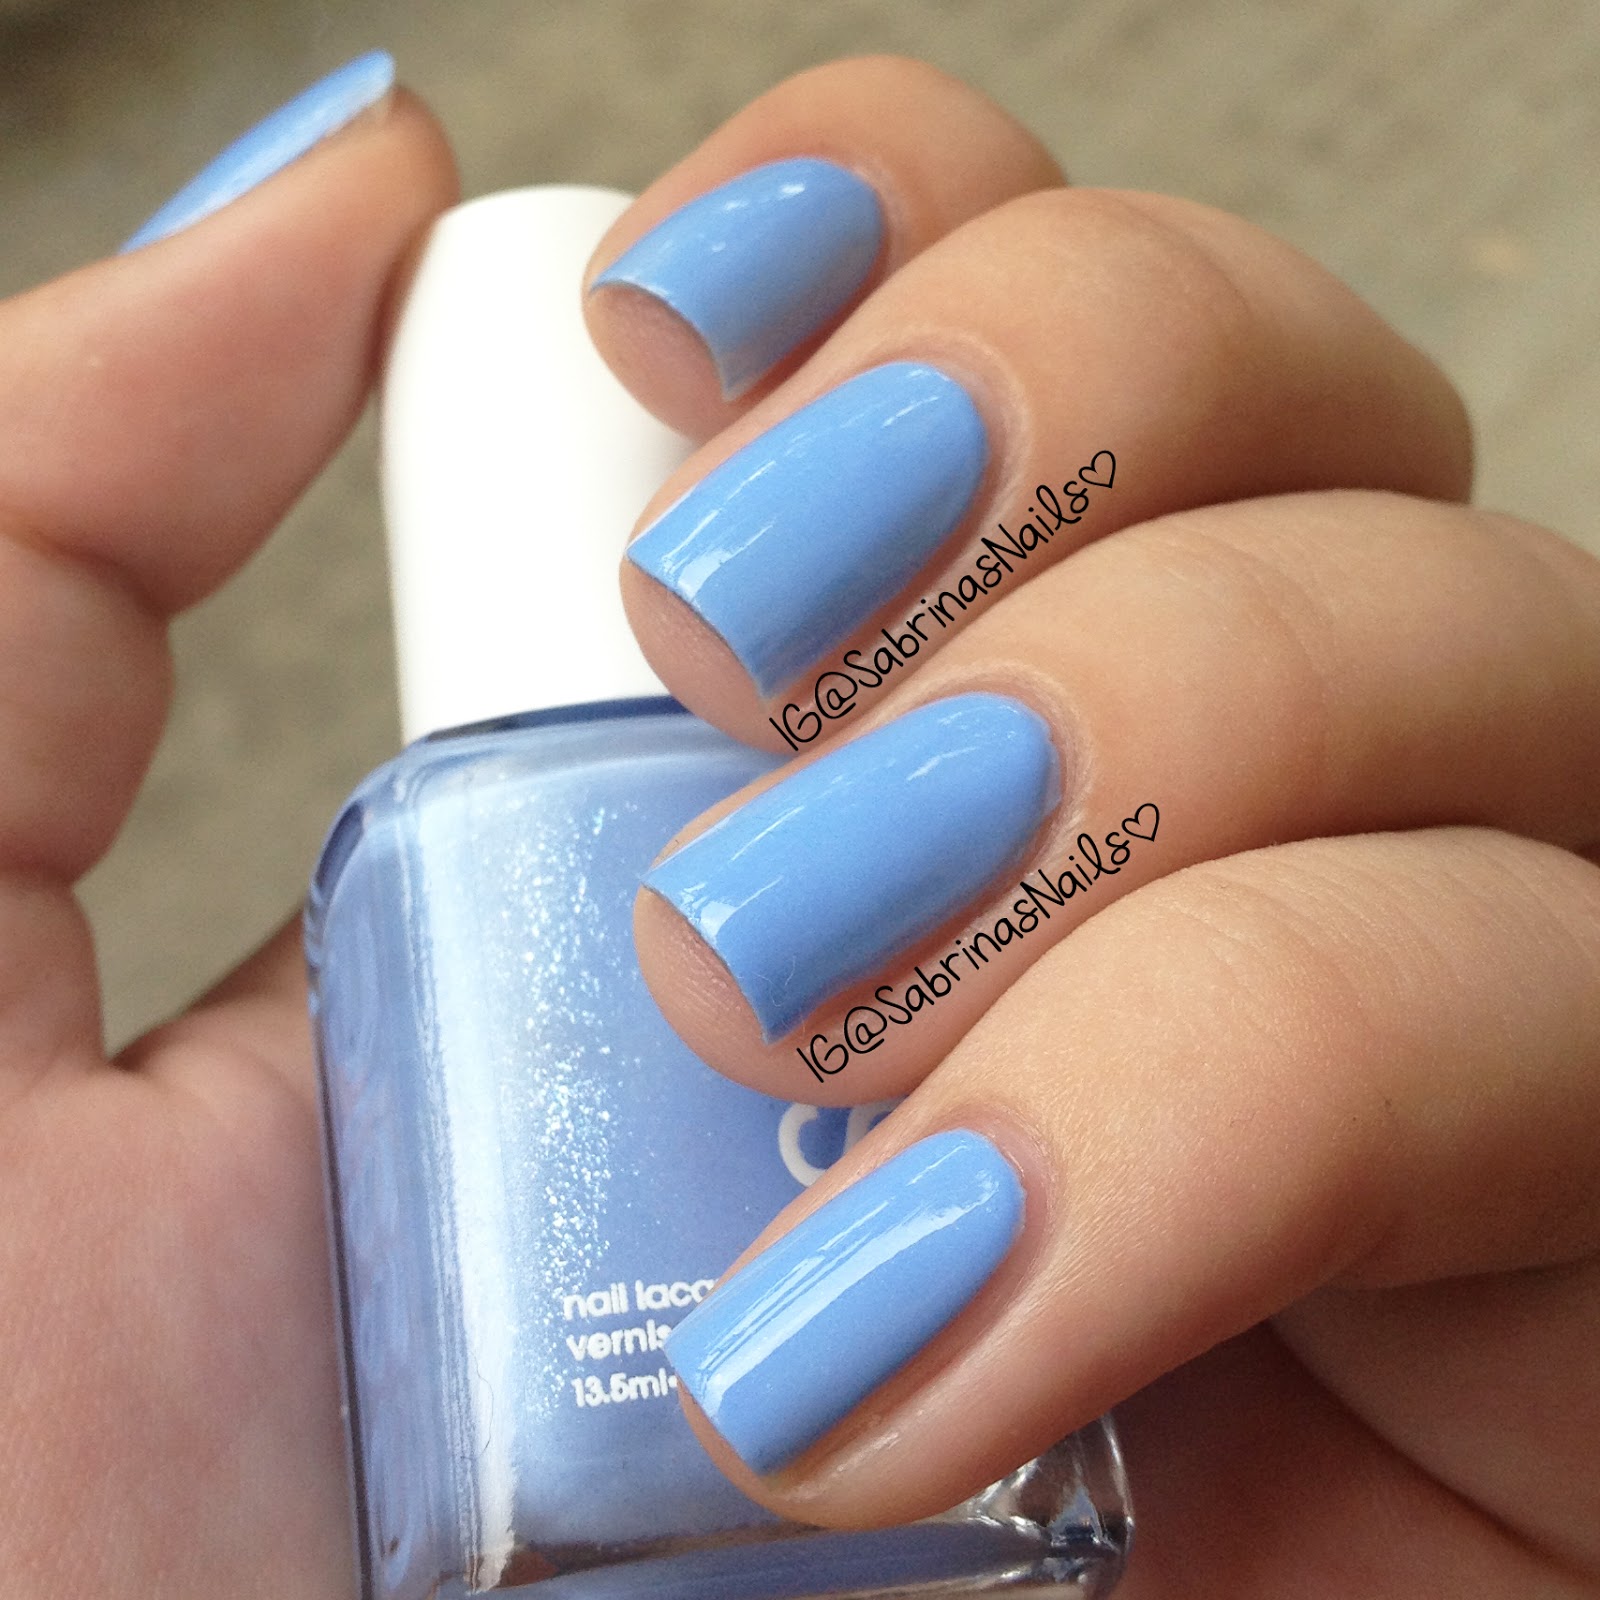
Carissa describes this polish as a "...milky white jelly full of periwinkle hexes in various sizes and small green hexes." I couldn't have explained it better myself! It looks gorgeous in the bottle.


+BLOG.jpg)


I began this mani with three coats of Bikini So Teeny by Essie, probably a favorite polish by most nail freaks like me! Unfortunately for me, I think I have a bad bottle of this stuff because ever since I first purchased it, it's been thick and hard to work with. I do try to make it look decent and hopefully I've succeeded!
One coat of Seche Vite really smoothed out the thickness of this polish and made it look sleek and effortless. This was the perfect base for Trapeze Swinger!
My nails feel very bright and fun with this polish on! These look great in the sunlight, every piece of glitter picks up the suns rays and reflects them to make your nails feel like a disco ball!
Up close you can really see all of the different glitters that are in this nail polish. Here's my rating of this polish:
Application: This polish was a breeze to apply.
True to Color: I definitely thought this was a light blue jelly polish from looking at the bottle. Turns out that it's actually a white jelly, but that just means that you can layer it over more colors and it definitely goes well over Essie's Bikini So Teeny!
Dry Time: 1-2 minutes.
Consistency: Normal, no issues with it.
Coats Until Opaque: It was definitely filled with glitter with 1 coat but I really wanted it to sparkle, so I added one more.
Additional Comments: If you love blue, you'll like this nail polish and it's gorgeous sparkle.
Final Rating: 8/10
To purchase, visit FreakShowPolish.com or visit Carissa's Instagram (Instagram.com/FreakShowPolish) to view more swatches and polishes!
Tuesday, July 23, 2013
Freak Show Polish: Strongman I
Strongman I is a glitter topper with round blue and green glitters to make any mani pop. In the bottle this polish is to die for, the glitters were just calling my name!
.JPG)


.JPG)
+copy.jpg)
.JPG)
.JPG)

I first started with three coats of Mint Apple by Sinful Colors which was also my Mint Mani for Talia Joy. I really wanted to be a part of that tag so I planned this swatch to go up on Friday. Mint Apple is a gorgeous shimmery mint polish.
I absolutely love this color and think it's perfect for summer. I topped this off with two coats of Strongman I and let me tell you, I was in circle glitter heaven!
This polish is a glitter bomb! Two coats did fill most spaces and I didn't have to fish for glitter too much, but being the perfectionist that I am, I did fill in a few empty spaces on my own. Other than that this polish is gorgeous! Since the base is clear, you can layer it over any base color that you wish!
Don't these glitters make you swoon? Here's my rating for this polish:
Application: This glitter topper went on pretty easily.
True to Color: The base is clear but the glitters are as vibrant as they are in the bottle.
Dry Time: 2-3 minutes.
Consistency: The clear base did get a bit thick at times but it wasn't too hard to work with.
Coats Until Opaque: It's a clear base but it does take 2 coats for the glitters to fill most spots on the nail.
Additional Comments: I think this polish is beautiful! I did have a hard time taking it off but that's not necessarily a bad thing! That just means it's definitely long lasting. I also did have to place a few glitters on myself but that's only because I'm picky and I need glitter to be EVERYWHERE!
Final Rating: 7/10
To purchase, visit FreakShowPolish.com or visit Carissa's Instagram (Instagram.com/FreakShowPolish) to view more swatches and polishes!
Subscribe to:
Posts (Atom)