
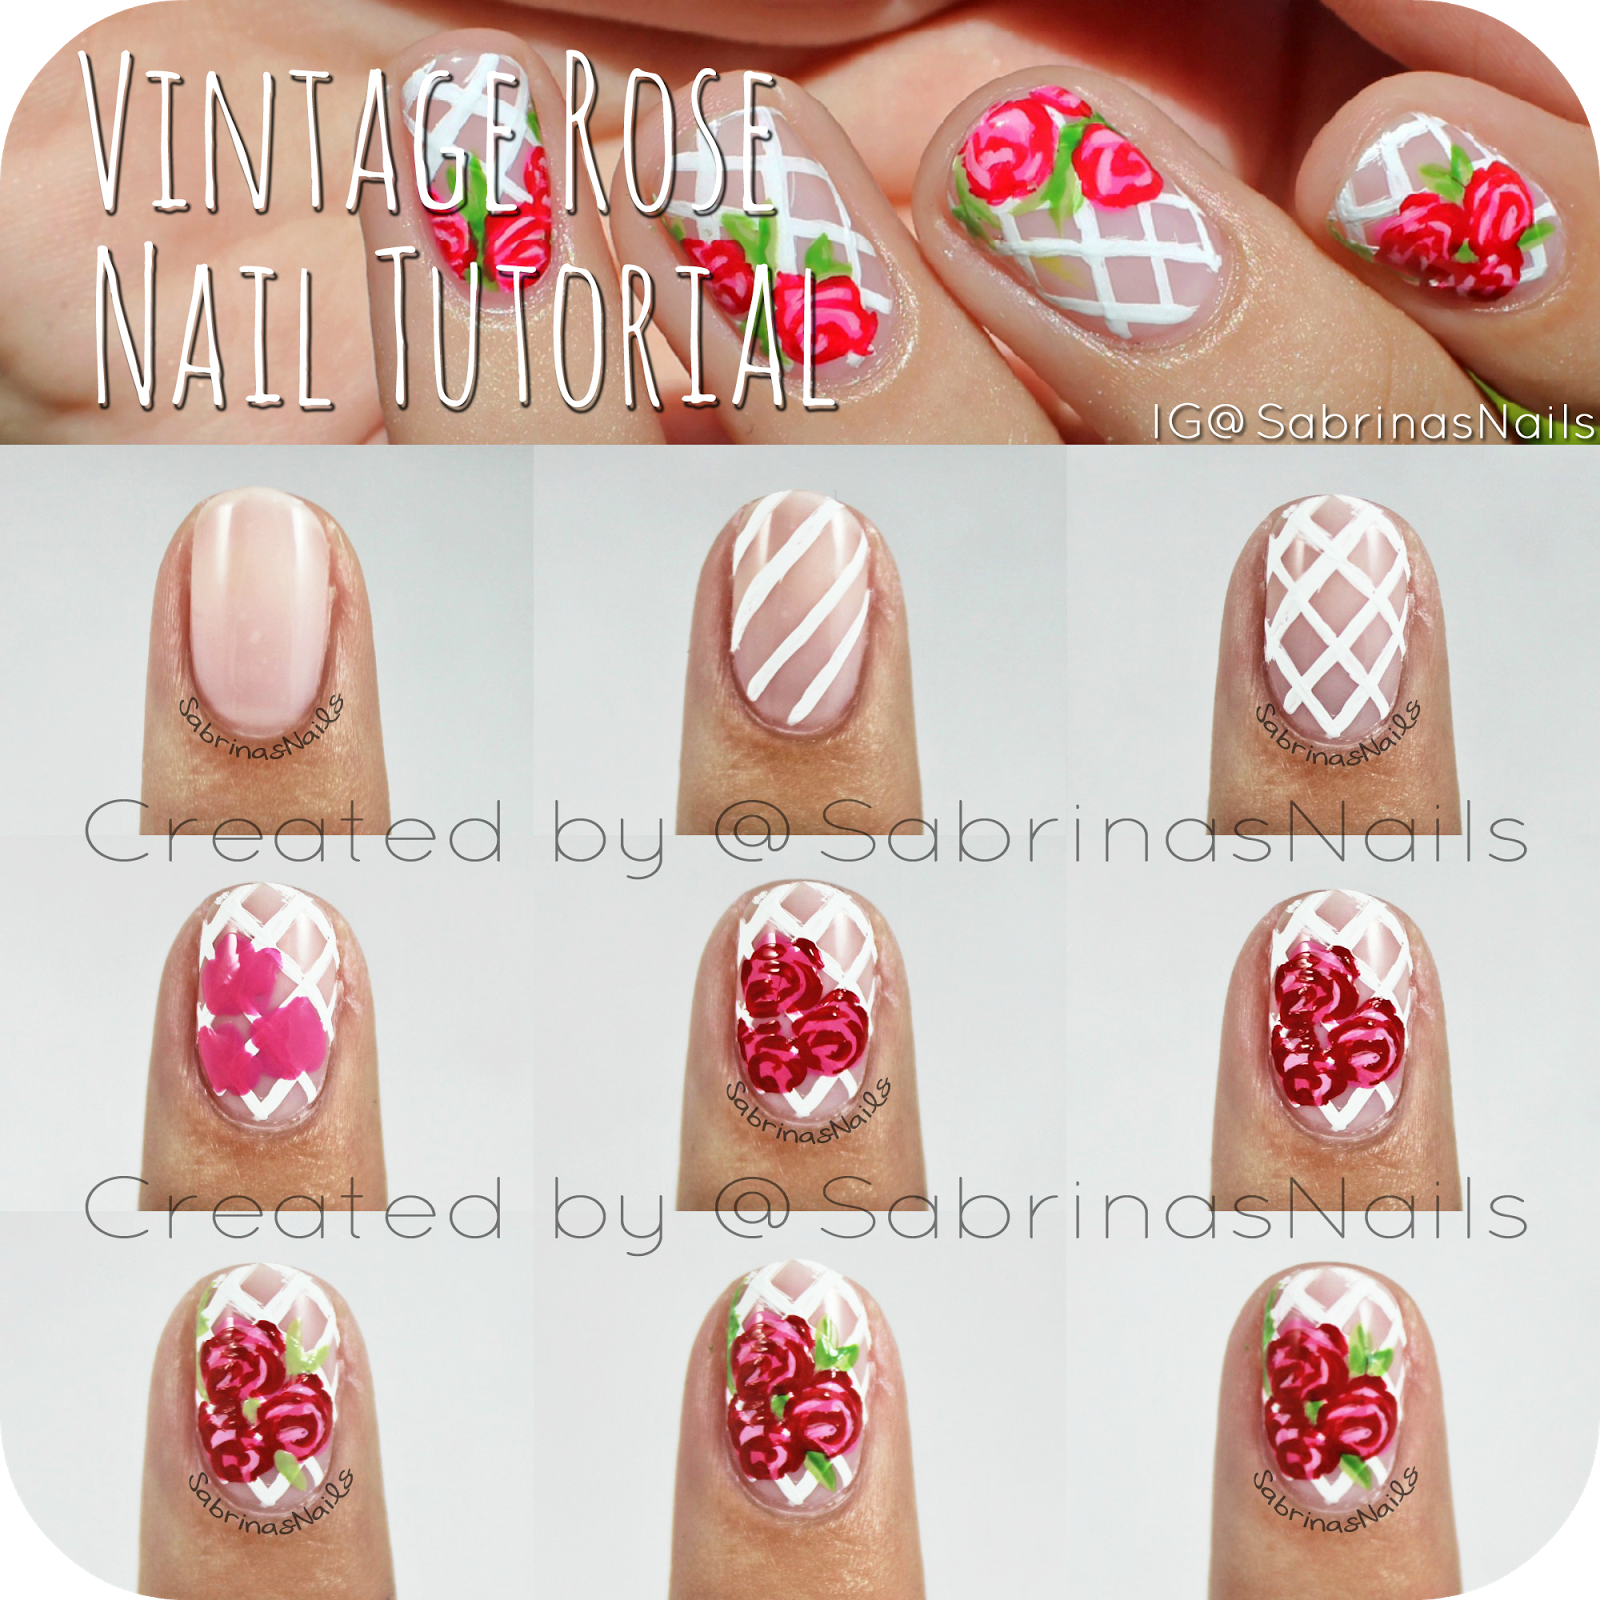
Materials:
- Base Coat (I used Essie's Grow Stronger)
- A flesh-toned base polish (I used Essie's Mademoiselle)
- A white striper polish or white polish and a striper brush (I used a white Stripe Rite polish)
- A light pink polish (I used Essie's Muchi, Muchi)
- A medium pink polish (I used Pink Forever by Sinful Colors)
- A dark pink polish or red polish (I used Siren by Pure Ice)
- A light green polish (I used Essie's Navigate Her)
- A medium/dark green polish (I used Exotic Green by Sinful Colors)
- A small detail brush
- A dotting tool
- Your favorite top coat (I used Seche Vite)
Step One:
After applying your base coat, paint your nails with a flesh-toned polish.
Step Two:
With your striper brush, create diagonal lines across your nail. Try your best to make these lines thin and evenly spaced.
Step Three:
Now create diagonal lines in the opposite direction to create a crosshatch pattern.
Step Four:
With a dotting tool or a small detail brush, take your medium pink polish and create a few blobs in the rough shape of roses anywhere on your nail. Don't worry if they're not perfect, we'll add details later.
Step Five:
With your dark pink/red polish and your small detail brush, create a few thin and curved lines in the rose. I'm not the best nail artist so I seriously just made some random lines haha.
Step Six:
This step is honestly optional. If you'd like to add some definition to your roses, you can take a light pink polish and add a few strokes of it to your rose to highlight certain areas.
Step Seven:
With your light green polish, paint a few leaves wherever you see fit. This doesn't have to be perfect, nature is unexpected and there's no wrong place to put a leaf.
Step Eight:
This is another optional step. Take your dark green polish and add definition to your leaves if you'd like them to look more realistic.
Step Nine:
Finish this design with your favorite top coat to ensure that it lasts a long time! :)
I hope you all try this design and love it! This pictorial may have more steps than usual but don't be afraid to try it! All of these steps are super easy and I know you all can achieve this nail look. If you do end up trying this, make sure to post a picture on Instagram, tag me in it and use the hashtag #InspiredBySabrinasNails so that I can see it and post it on the "Your Recreations" page of my blog! Also feel free to repost this pictorial anywhere as long as you give me direct credit in the caption :) Thanks for reading everyone! ♥

I absolutely love this design! It's amazing that you did it freehand, and it's one of my favorite designs of yours ever. its awesome man.. for further information please visit this site: http://knowfrome.com/
ReplyDeleteLooks marvelous !! I love rose nail art.I really impress from your post because it show all steps clearly.Thanks for sharing this information with us.......
ReplyDeleteNail paints color and it's mix up matching is also too nice. Color combination is giving this design a beautiful look. Thanks for sharing this new look nail art designs and nice post.
ReplyDelete